In this article, we will focus on deploying HIDS agents on our VMs in VLAN 20, the Corporate LAN network. I was planning to use osquery (FleetDM) because you should have nice asset management plus a good HIDS solution but for some reason, I never managed to configure it. Last thing I’ve tried to update SO to 2.3.260 with soup commands, but now I can’t even open FleetDM, so I won’t bother with it anymore. I will use Wazuh even tho from the 2.4 version in SO it won’t be supported anymore officially. Even tho, Wazuh is still one of the best free and open-source HIDS out there so it is good to learn it a bit.
Firewall changes
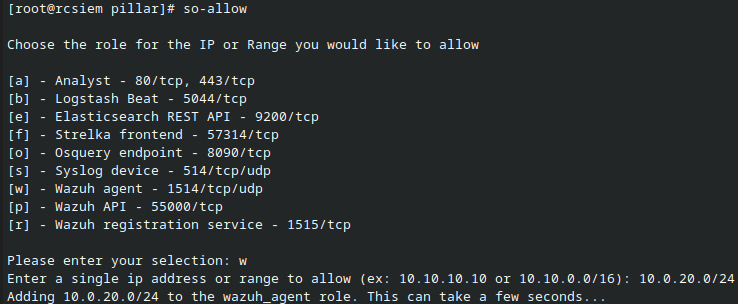
The first thing we need to do is to allow Wazuh traffic from the agents to SO Wazuh Manager. Login to SO CLI and use the so-allow command. Select option w and then add VLAN 20 network and press enter. Do the same for option r Wazuh registration service.
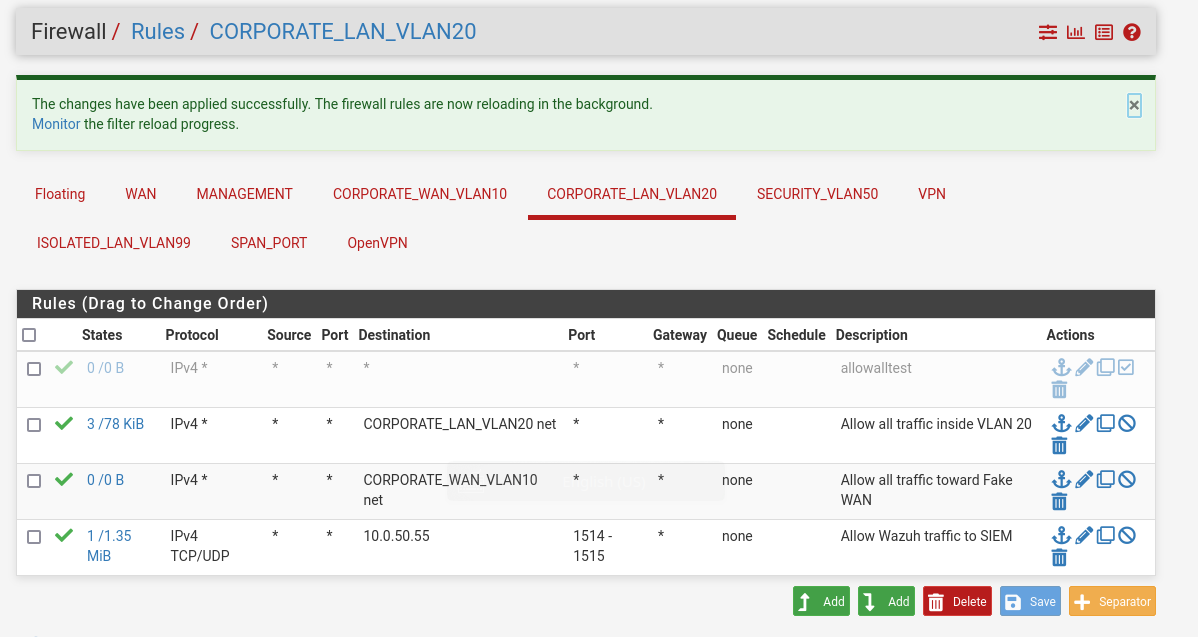
Now we need to allow Wazuh TCP/UDP traffic on ports 1514-1515 on our pfSense firewall. Create a firewall rule that will allow both TCP and UDP traffic in the port range 1514-1515 toward SIEM IP address.
Deploying Wazuh agents
Note: Before further installation make sure you check updates made to the Domain Controller deployment regarding static routing that is needed for endpoint log shipment.
Host registration
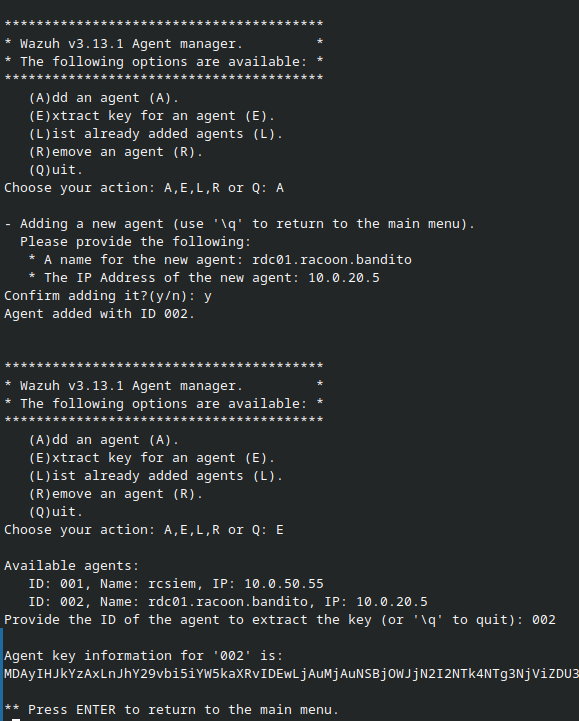
Before we install agents on VMs, we need first to register them in SO Wazuh Manager. Login to the SO CLI and run the command so-wazuh-agent-manage. Follow the instructions by selecting option A and then add the hostname and IP address of the VM you want to add. Then return to the menu and use option E and agent ID to extract the key for that host. Repeat the process for each VM (in my case, Linux Server, AD, Windows 7, and Windows 10) and save the keys for later. Don’t worry if you see them Base64 encoded. They will work for Windows, for Linux we will decode them.
Windows installation
For Windows, we will use Wazuh in combination with Sysmon. For Sysmon download, follow instructions from the Security Onion Sysmon documentation page. Sysmon config file download from Neo23x0 GitHub profile.
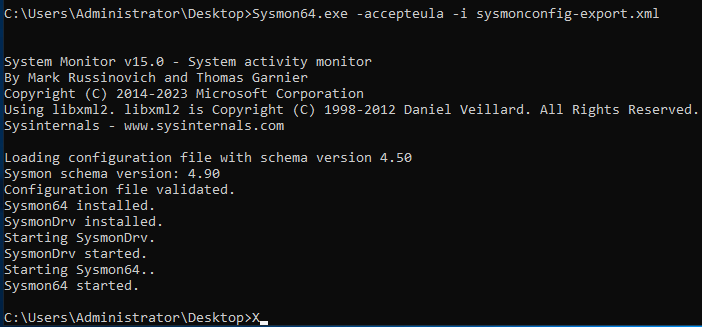
Once downloaded, move files to the VM desktop, log in with the admin user to the machines, unpack Sysmon.zip and run CMD as administrator. Go to the folder where you moved the files, unpack and just run the command sysmon64.exe -accepteula -i sysmonconfig-export.xml. This will install and run Sysmon.
Now move the Wazuh installation file that you’ve downloaded from your SIEM download page and run it. Follow the instructions and once installed run the configuration. You will then need to add the SIEM management IP address and the key you extracted earlier for that host. Save the config and start the agent.
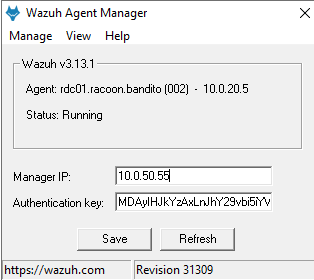
Now we need to change the configuration to add Sysmon logs to Wazuh. From Wazuh Agent Manager go to View > View Config and add the bellow code to the config file right after the last localfile block section. Save the file and restart the agent service.
1
2
3
4
  <localfile>
    <location>Microsoft-Windows-Sysmon/Operational</location>
    <log_format>eventchannel</log_format>
  </localfile>
Linux installation
For Linux, we only need the DEB file from the SIEM download page. Download it and move it to your Linux server. Login to the server on CLI and go to the directory where you transferred the file. Use the command pkg -i wazuh-agent_3.13.1-1_amd64.deb to install the Wazuh. Do note, that the DEB file name may be different than the one I am using in this tutorial.
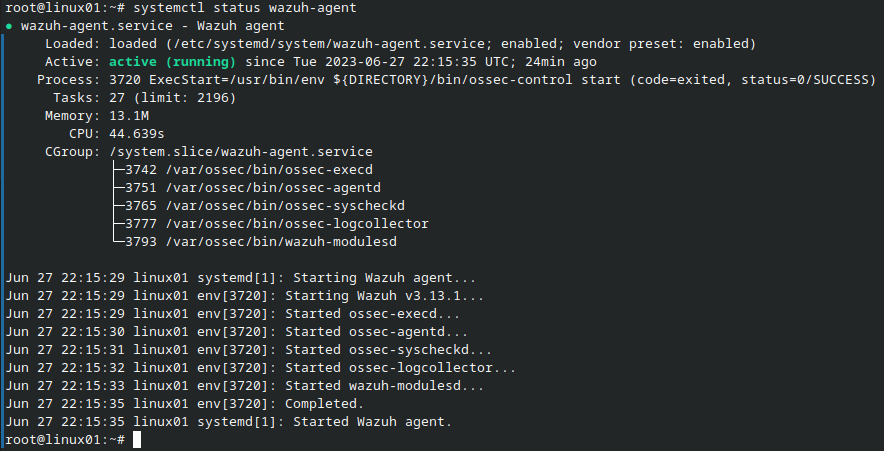
Now we need to change clients.key file. You will find it in /var/ossec/etc/client.keys. Extract the key from SO Wazuh manager and paste it in CyberChef with the filter From Base64. You will get the output in format for example id hostname ip_address secret_key. Copy and paste it in clients.keys field and save it. Now use the following commands to start the Wazuh and check the status.
1
2
3
4
systemctl daemon-reload
systemctl enable wazuh-agent
systemctl start wazuh-agent
systemclt status wazuh-agent
Data verification
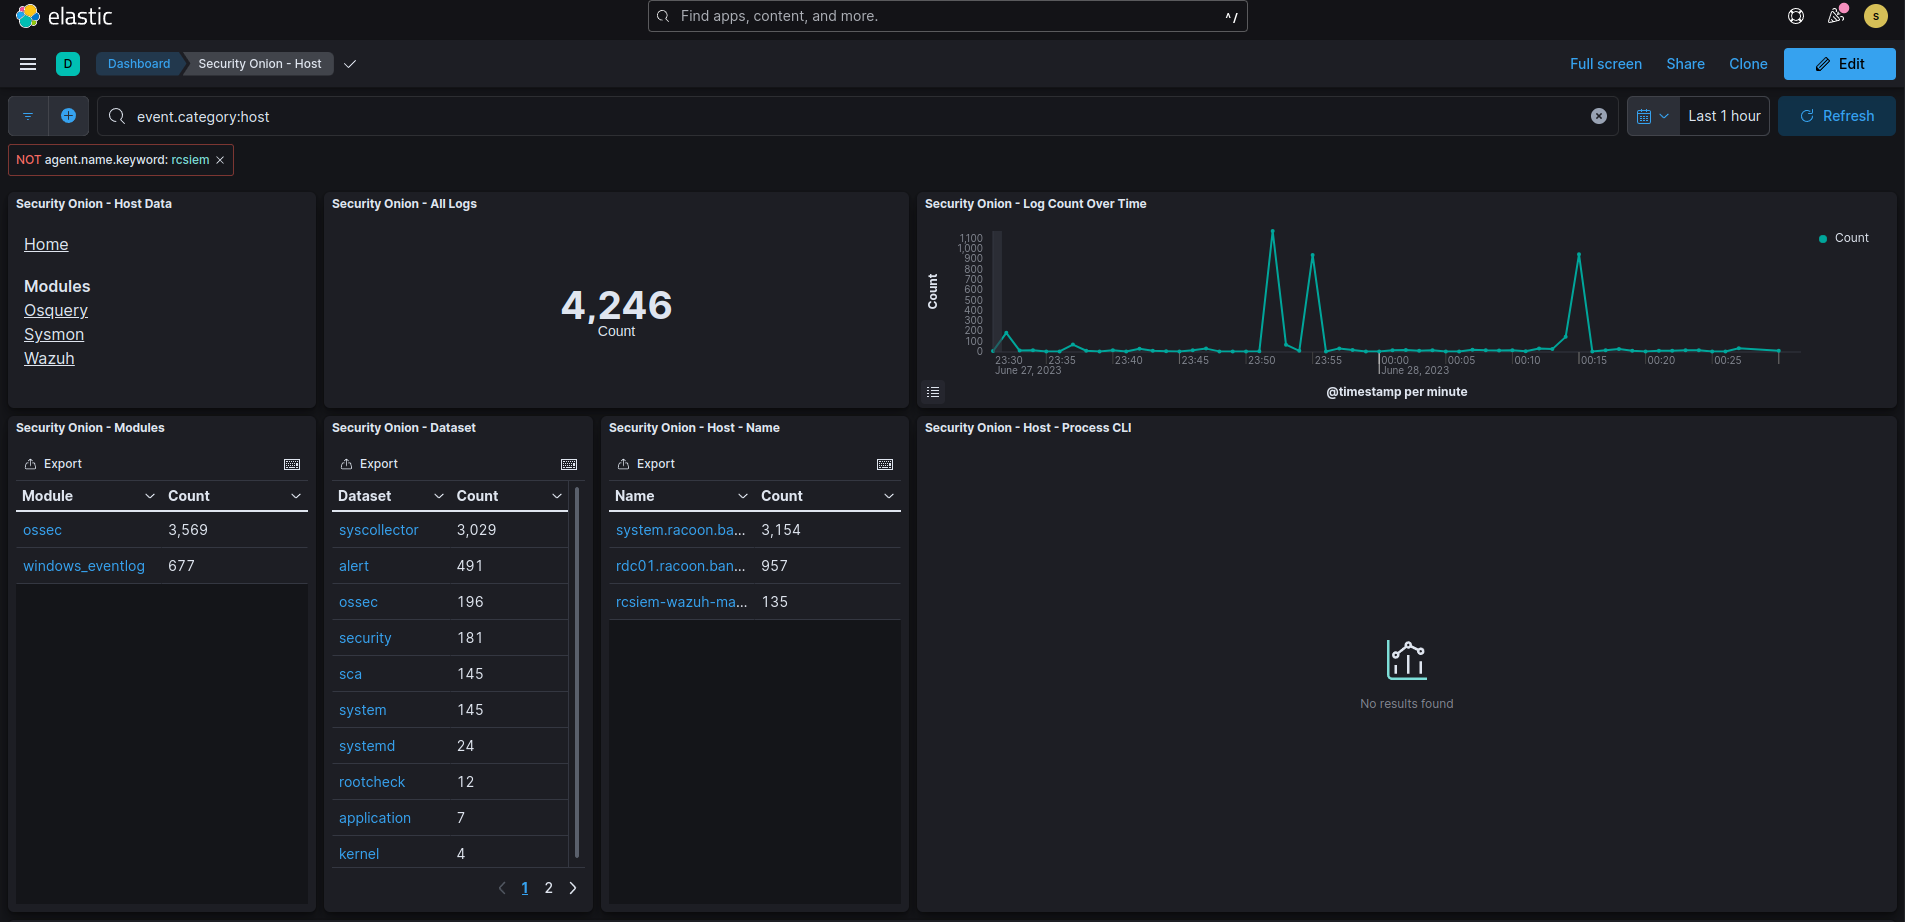
Let’s now quickly verify whether we receive our logs in Security Onion. Open the Kibana page from the main SO page and then select Host page.
Select the first Wazuh module of host data and see if you receive some Wazuh logs.
Now select Sysmon module of host data and see if you receive some Sysmon logs.
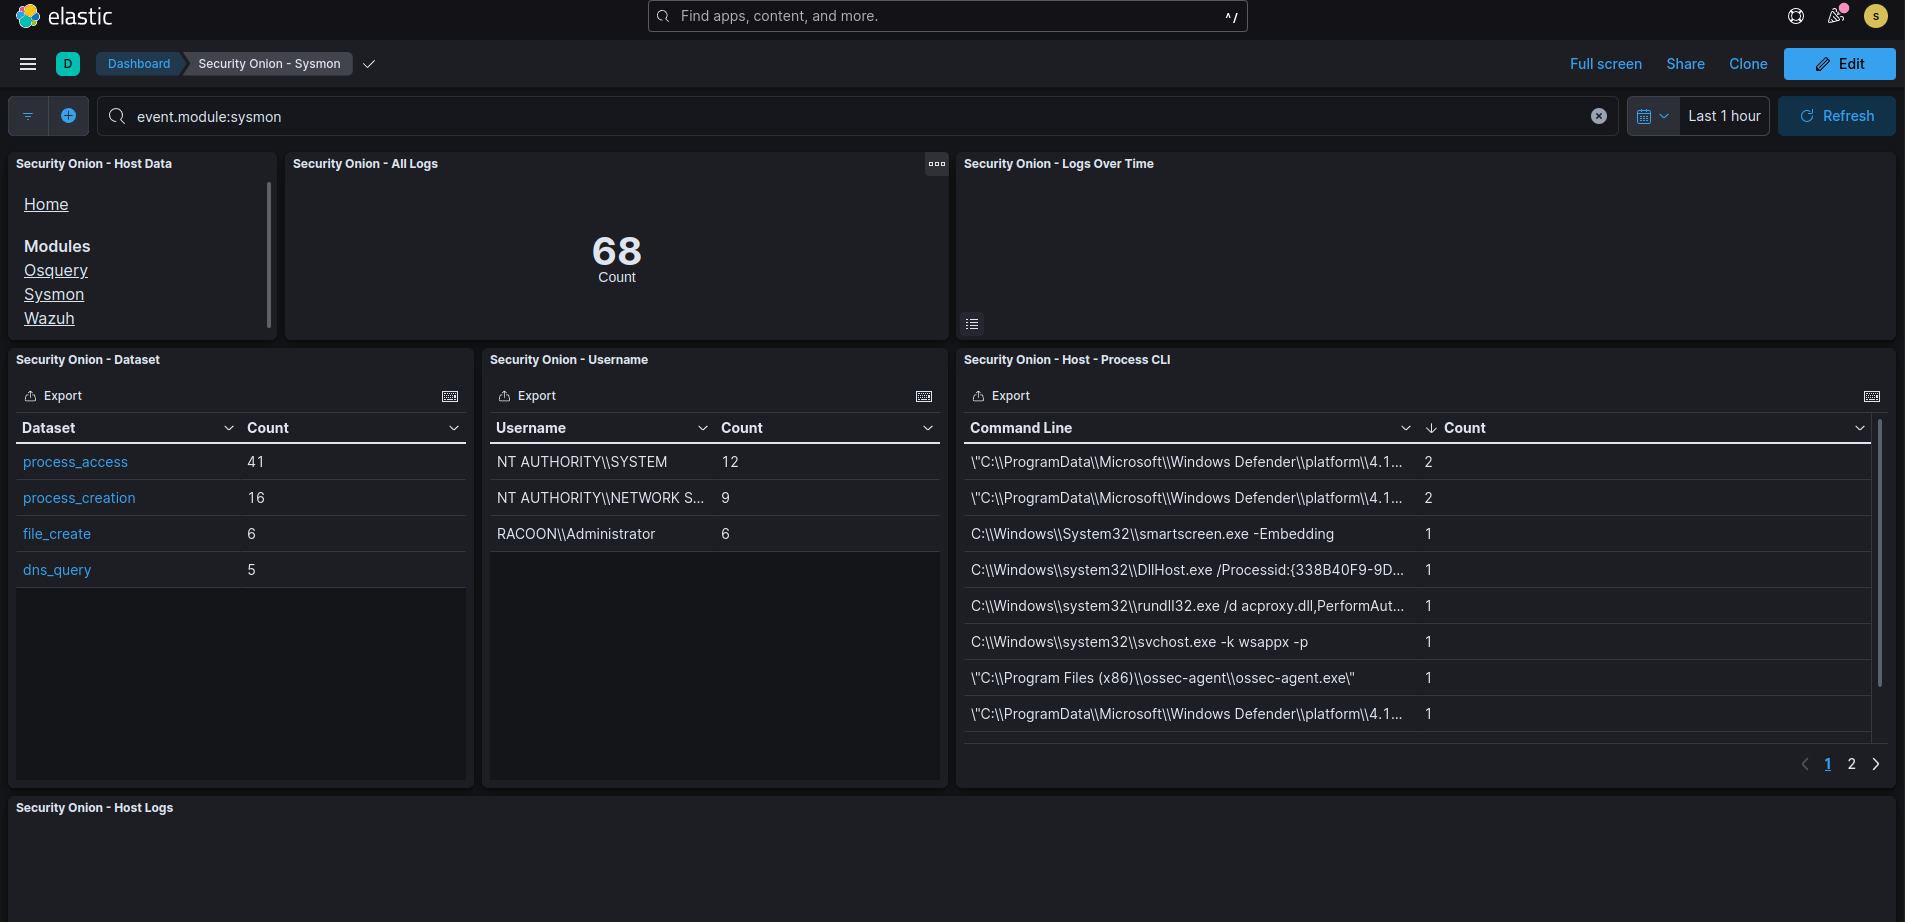
If you see your data then perfect! You’ve managed to deploy the agents and successfully ship logs to Security Onion.
If you do not see logs, check Wazuh logs to see what is the issue. Make sure you allowed traffic from VLAN 20 network on both the pfSense firewall and Security Onion with so-allow command.
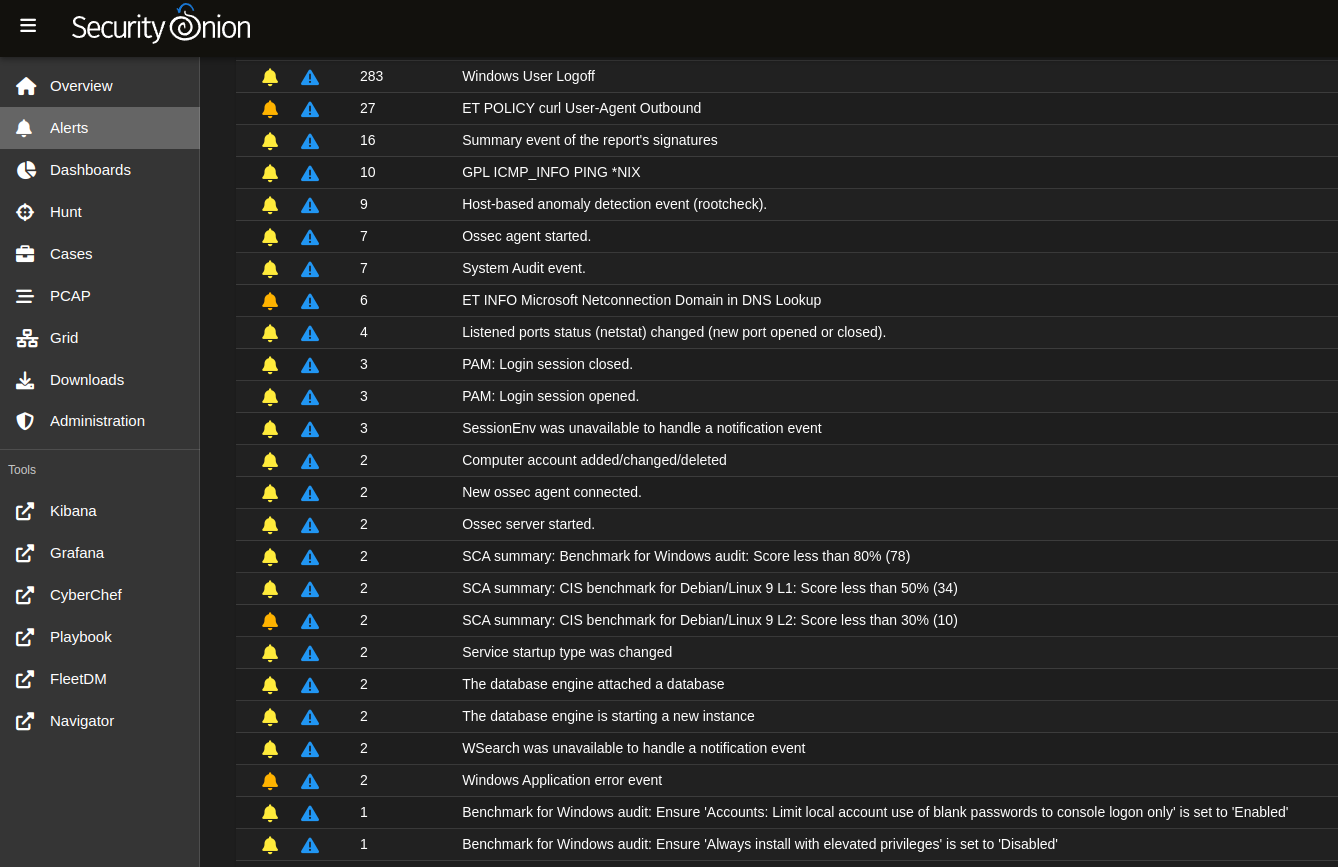
Also if you go to the Alerts page from the main SO page, you should see some interesting first alerts from the Wazuh.
Summary
Okay, so we managed to deploy the agents and send some logs from our corporate network to the SIEM. Now only need to make a few use cases and test our environment. Until the next time.