Update 28/06/2023
Updated Roles and Features section as I realized I was missing a crucial role to install, Remote Access role. Also added a new section, Static Routing.
It’s been a while since I worked on my home lab, as I was busy with some personal things also for some time VMWare fucked up something with one of their updates and it did not work with the specific versions of Kernels and I did not want to revert to older kernel version as the new one worked well with other things on my laptop. Today we will start building a corporate network for our home lab, which will contain a few workstations presenting endpoints, and a few servers like AD, mail server, database, etc.
This article will focus on setting up a Windows 2019 server as a domain controller with the functions of active directory, DNS server, and file share server. We will use Microsoft’s Windows Server 2019 Evaluation server for the lab. Microsoft gives 180 days of Windows Server 2019 (and also Windows 7 and Windows 10), totally free. Once installed, you create a snapshot and you can always revert it once it expires.
Please do not use these images for production servers or for your personal PC and laptops. I am not sure whether they are limited with some features, but I am pretty sure they are not meant for cases other than testing and labs.
Installation
I will not bore you with the installation steps of the server, as it is pretty straightforward:
- Download the ISO
- Create a new VM
- Name it something like “Windows Server 2019”
- Install it with the default values (except the user password of course)
- Start the machine and create a vanilla snapshot
Configuration
Network and Hostname
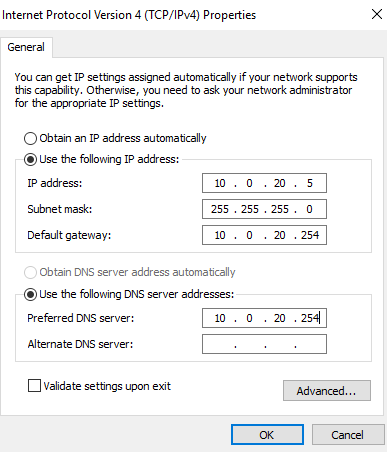
First what we need to do is to set the VM network adapter in VLAN 20 and set a static IP address.
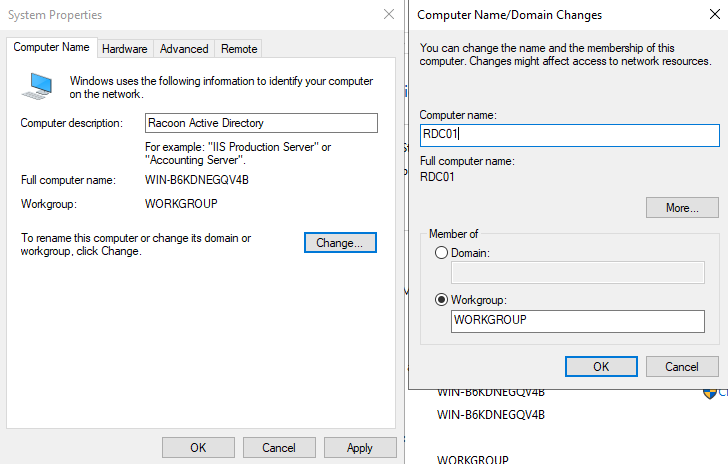
The second thing that we are going to do is to change a server name. This can be done in System Properties and in my case, I named this server RDC01 (Racoon Domain Controler 01).
After saving the config, you will need to restart the VM so changes can be applied.
After restart, we will install roles and services.
Roles and Features
Go to Server Manager > Manage > Add Roles and Features and accept all default settings until Server Roles. In Server Roles select the following roles and click the Next button:
- Active Directory Domain Service
- DHCP Server
- DNS Server
- File and Storage Services
- Remote Access
After selecting these roles, just go with the default settings till the end and the installation will begin.
After installation is completed and you close the installation window, you will notice in Server Manager a few notifications that warn you to complete the configuration of installed services.
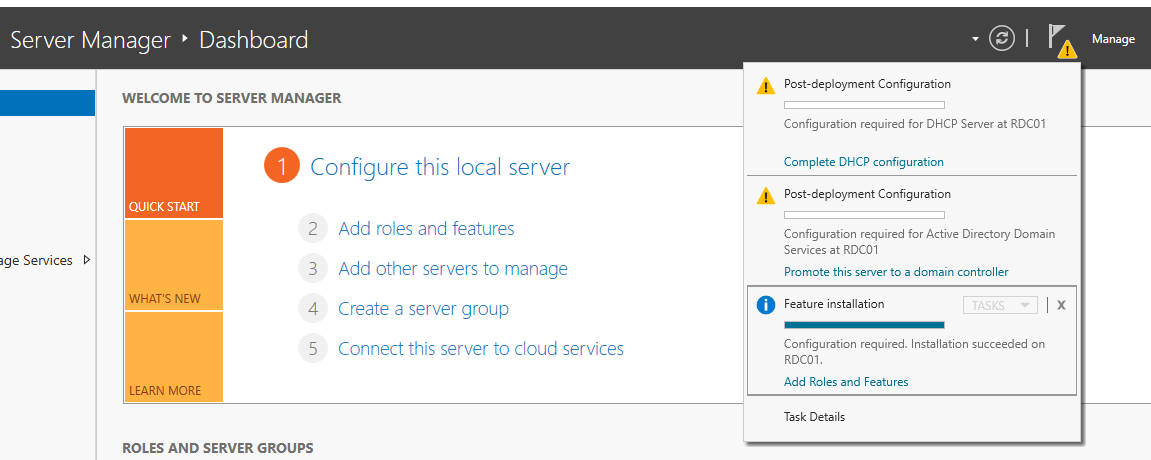
We will need to complete the role of AD by clicking on Promote your server to a domain controller.
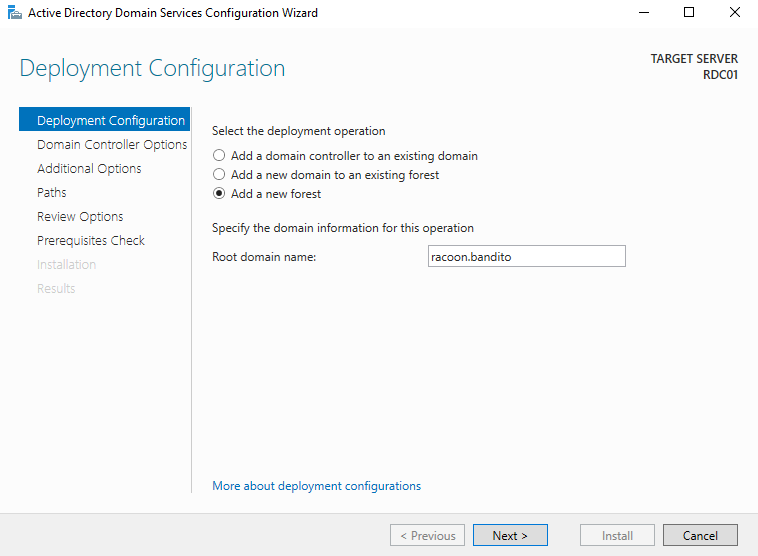
Add a new forest and enter your domain.
Next enter the password of the user Administrator and then continue with the default settings till the end.
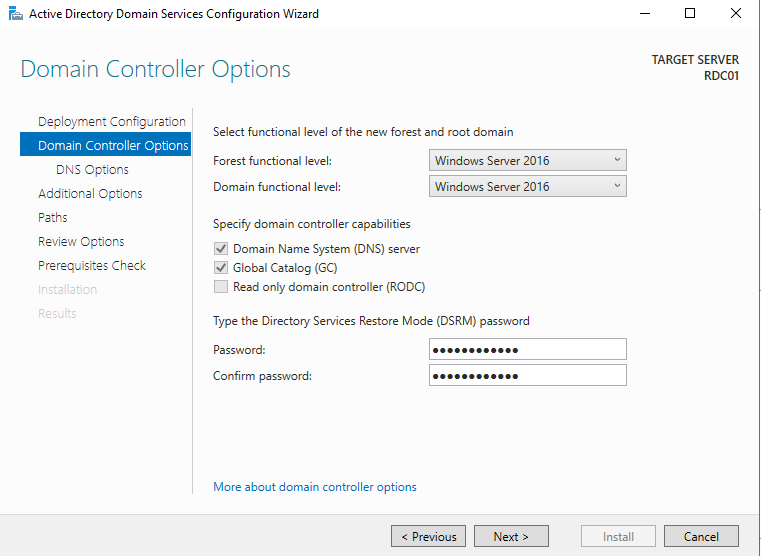
During the configuration, the VM will restart by itself and it will take a few minutes to configure.
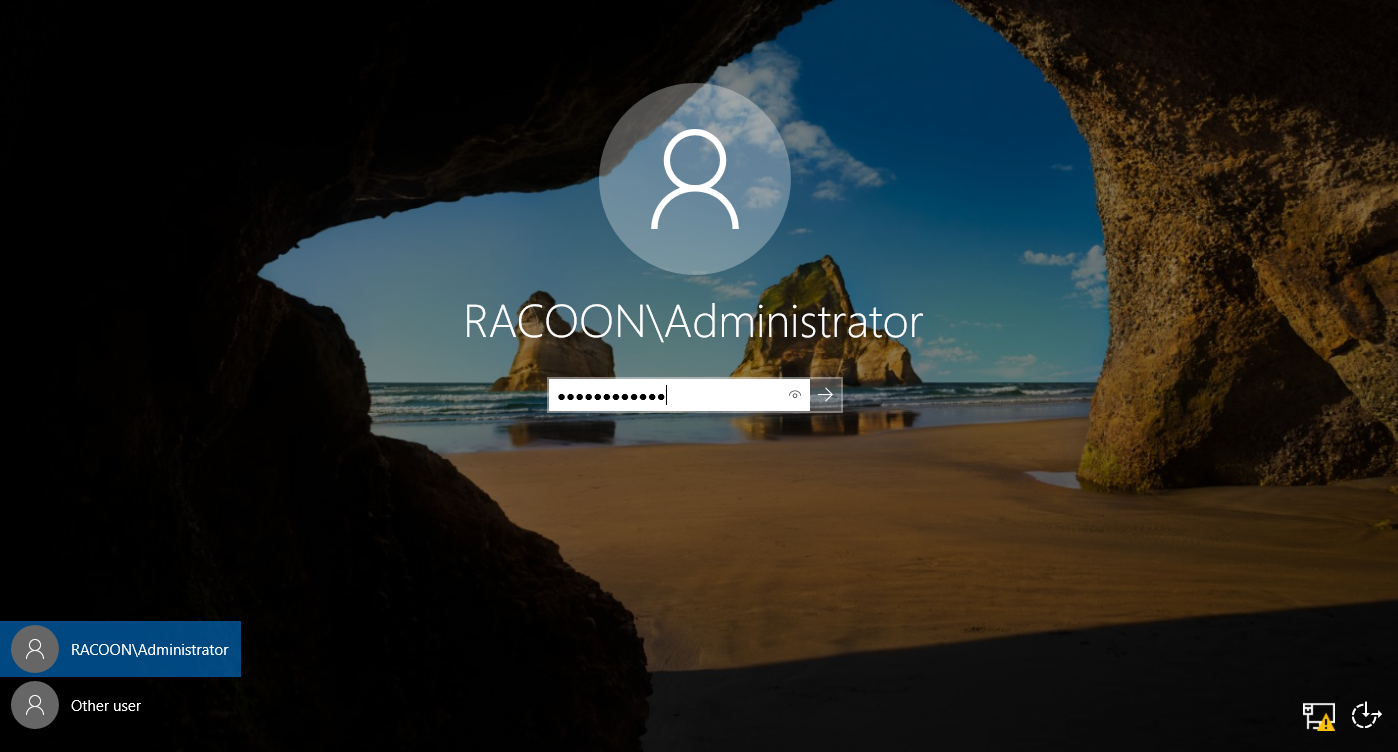
If everything went well, you will get a prompt to log in with the user Administrator on your domain.
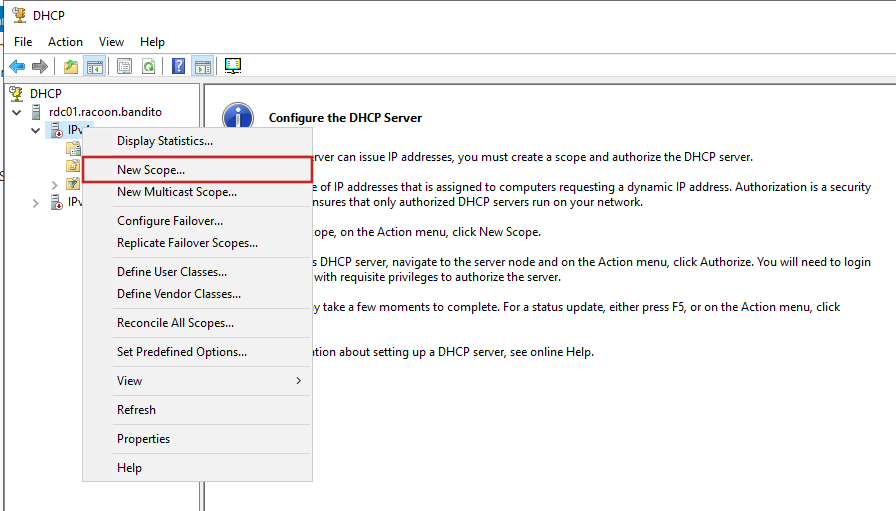
DHCP
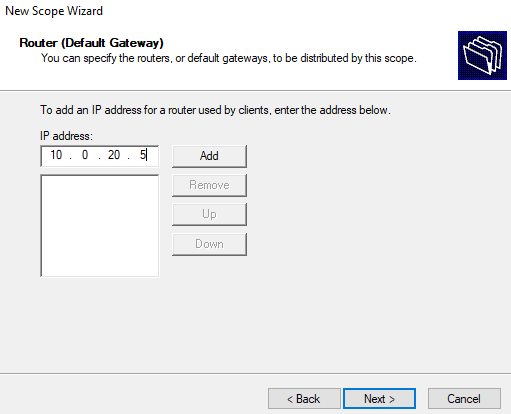
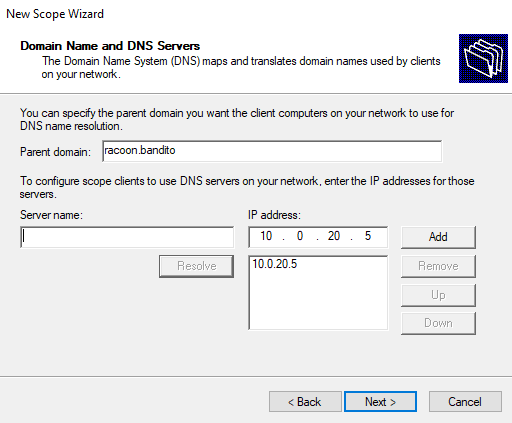
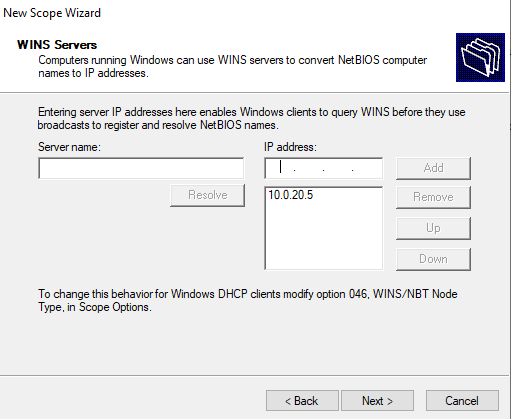
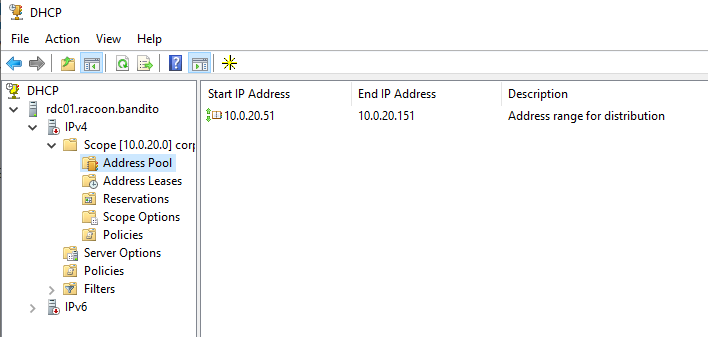
Let’s now configure the DHCP server. Open Server Manager and go to Tools > DHCP. Right-click on IPv4 and click New Scope.
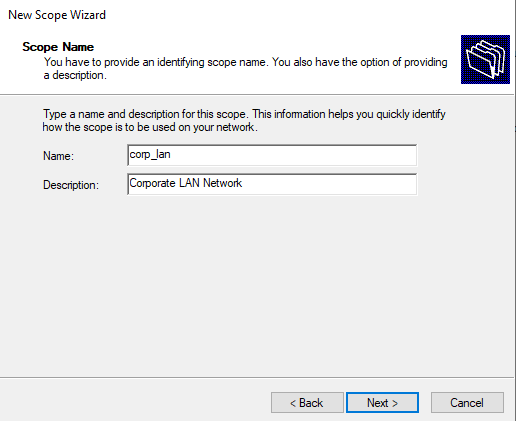
Enter the name of your network and description.
Next, we are going to configure a specific range of available IP addresses, because in a real environment you always have some IP address range reserved for the servers and other devices that require a static IP address, of course.
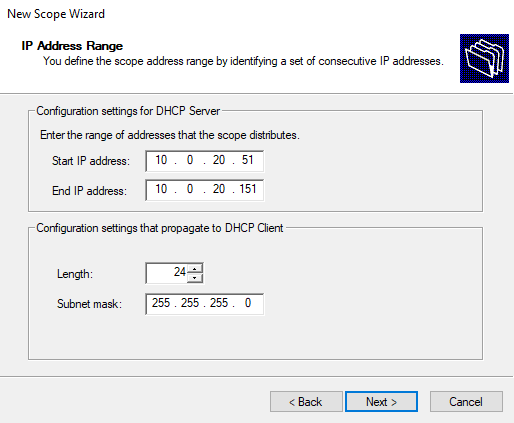
Then we configure our domain controller as a default gateway, DNS server, and a WINS server.
Then just go next with the default things and once completed, you should see your pool in Address Pool.
DNS
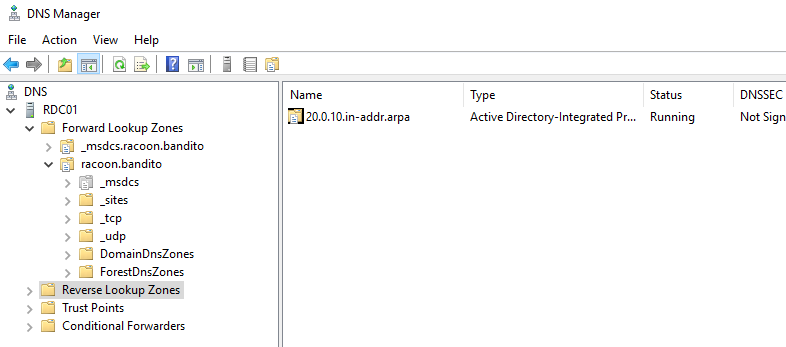
First, we are going to set up a reverse zone. From a Server Manager open Tools > DNS. Then right-click on the Reverse Lookup Zones and click on the Create new zone. Just click on the Next button until you come to the part to enter the network ID. Enter 10.0.20 and go further until the end. And then you will see your reverse zone created.
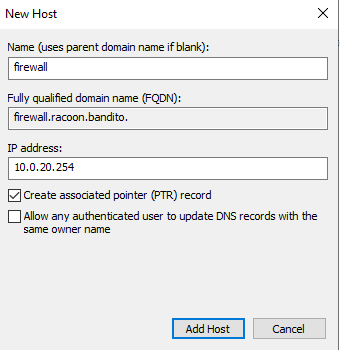
Then we are going to add a DNS entry for our firewall by right-clicking on the Forward Lookup Zones > racoon.bandito and then clicking on Net Host (A or AAAA)….
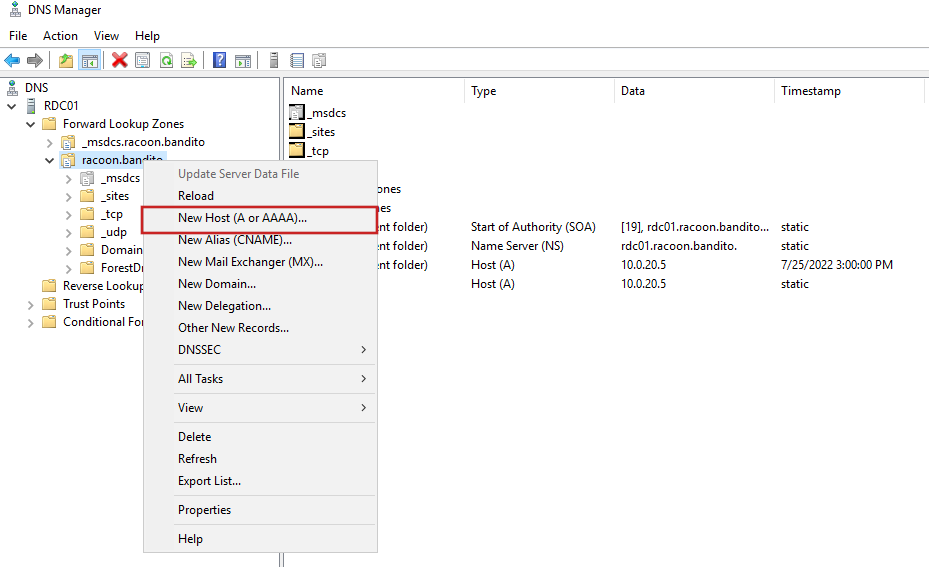
Enter the name and the IP address. Also, leave Create associated pointer (PTR record) marked and click on the Add Host button.
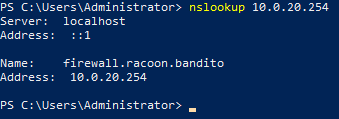
Now if we do simple nslookup command we can see our firewall is getting resolved correctly.
Because at this point I am not sure yet if I will have another Windows server, nor how I am going to name other servers, I will not create for now any other DNS entry.
Static Routing
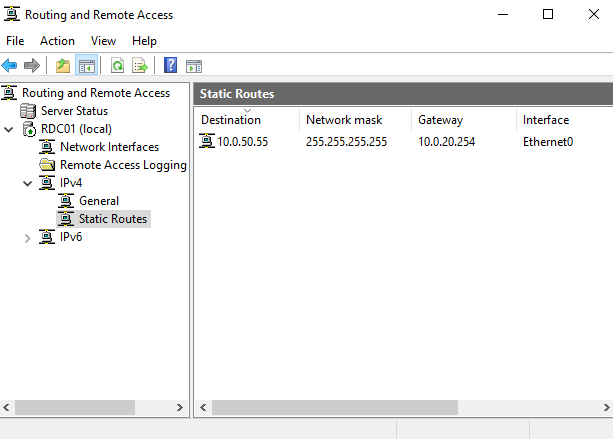
We need to make our DC a routing point for the endpoint, otherwise, it won’t be able to access SIEM on specific ports to ship the logs, once we come to that part. From a Server Manager open Tools > Routing and Remote Access and right-click on your DC (local) and then select Configure and Enable Routing and Remote Access. Follow instructions by selecting Custom and then LAN.
Once completed go to RDC01 (local) > IPv4 > Static Routes and add a static route toward the future SIEM IP address and save the configuration.
Users and groups
Before we start with the users, as we are creating a Blue Team Lab, we want to simulate poor designs and security practices in an IT environment that are present all the time. One of those is the weak practice of strong passwords. Now Microsoft does enforce some practices by default, but there are always cases where people complain it is too complex for them to make up some strong password, so these requirements are often changed. We will disable the default password policy so we can apply for some of our users, weak passwords. To do this, please follow guides from this link as I find it very easy and straightforward.
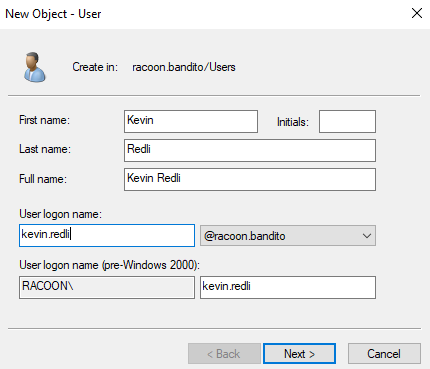
Now let’s create a few users and groups to have a real working environment. From Server Manager go to Tools > Active Directory Users and Computer.
Then right-click on organizational unit Users and then click on New > User. We will use first and last name as a login name in the format firstname.lastname. For the password, I suggest using a few randomly generated strong passwords, and a few from the famous rockyou.txt list so you can practice maybe a brute-forcing password of the users. Also, set passwords to never expire.
Now create a few more users, so we can have a few administrators, some in the HR department, some in IT, and so on.
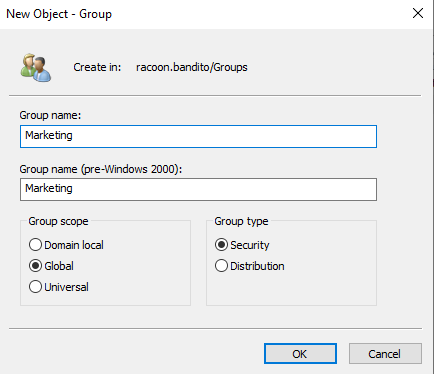
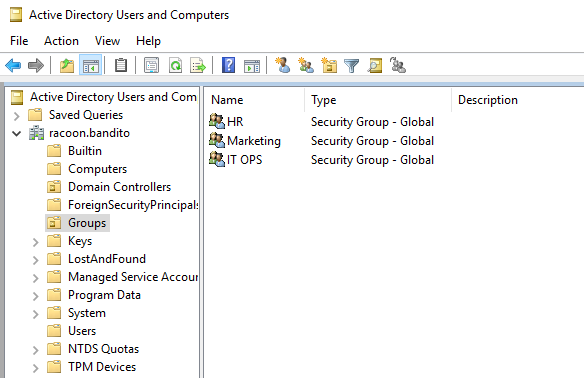
Now we are going to create an organizational unit (OU) and name it Groups and inside of it, we are going to create 3 groups (or more if you want): HR, Marketing and IT OPS.
Now go for each created user and assign them to the group(s) so you can have in each group at least one user and also add some to the Administrator group.
Local Admin Policy
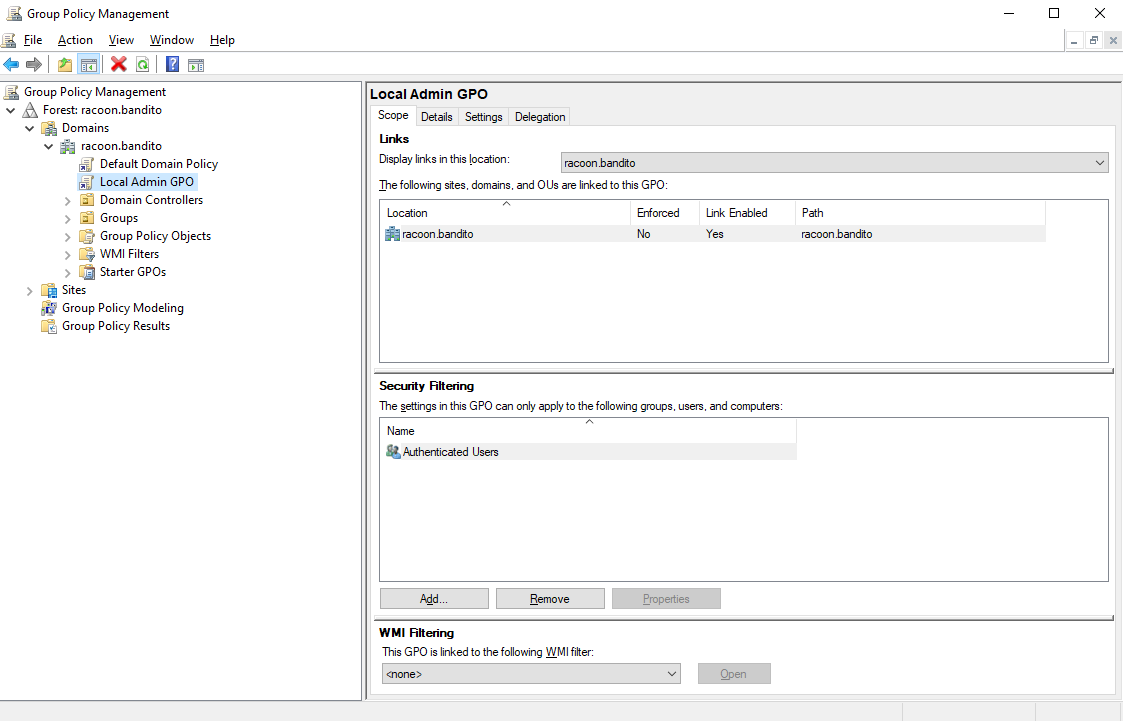
We will also create a local admin policy so we can have some sort of an local admin account that can manage host devices. From the Server Manager open Group Policy Management and create a new policy named Local Admin GPO.
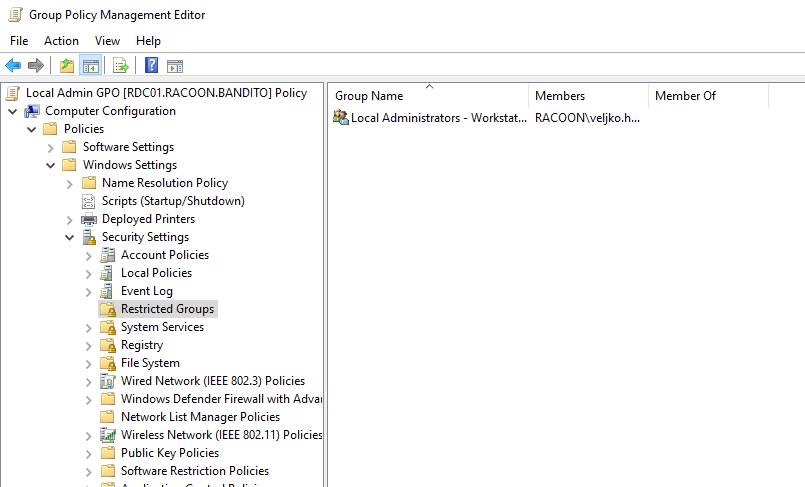
Then edit it and go to Computer Configuration > Policies > Windows Settings > Security Settings > Restricted Groups and create a new group inside of it and name it Local Administrators - Workstations (or somethign different if you like).
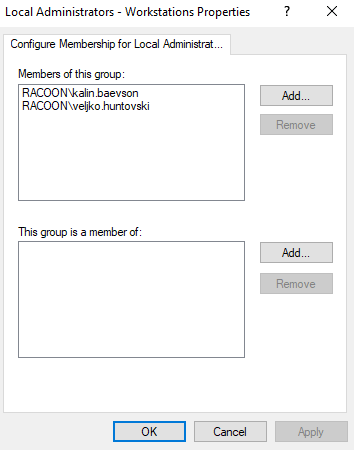
Then you need to add either few users that you would liek to be local admins, or a group that contains users and save the changes.
Shared folder
And for the end, we are going to create a shared folder that will support SMBv1 which is as you may or may not know, an obsolete version of the SMB protocol that is quite insecure and should be avoided. Of course, we are going to enable it so we could practice SMB detection and mitigation of its vulnerabilities.
On the C: drive, create the following folder structure:
1
2
3
4
5
"C:"
|-- "racoonshared"
    |-- "HR"
    |-- "IT OPS"
    |-- "Marketing"
Now for each of those folders (including racoonshared) we are going to share it with the previously created groups and set up correct right permissions.
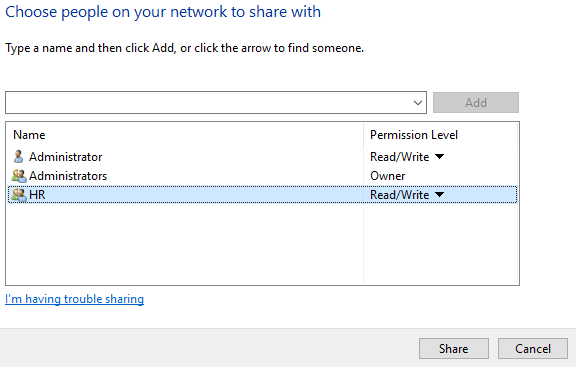
In the Properties of HR folder, go to the Sharing tab and add HR group. Change their permission level to Read/Write and click on the Share button.
Now do it for other folders and give the rights to their corresponding groups.
We can create a few files and pictures inside of it just to not have them empty.
Summary
Okay, so we reach the end of this part. Do not worry if we did not verify our work in this article. I did it on my machines and everything should work well, so be sure to follow up on my next article where we will deploy corporate end devices and join them to our domain.